Last updated: June 9, 2026
Sod Calculator
Planning a new lawn feels simple until you start buying materials and realize you ordered too little sod. Under-ordering means extra delivery fees, patchy coverage, and frustrating delays during the most critical installation window. Over-ordering wastes hundreds of dollars on material that sits unused and dies in the heat.
The Professional 12-in-1 Sod Calculator Suite solves every one of these problems. This tool handles every stage of your project, from your first area measurement all the way through your 5-year maintenance budget. Instead of jumping between a dozen separate spreadsheets, you work inside one connected system.
Why Simple Guesses Lead to Costly Landscaping Mistakes
Most homeowners assume their yard is a clean rectangle, but very few properties actually are. Curved garden beds, diagonal fence lines, side yard strips, and irregular walkways all create hidden square footage that manual estimates miss entirely. A small miscalculation early in the process compounds into major material shortfalls by the time your pallet arrives.
Experienced contractors know that even a modest 10% error on a 2,000 square foot lawn means 200 square feet of missing coverage. That gap forces an emergency pallet order, which typically costs far more per unit than bulk purchasing. Precise upfront measurement is always cheaper than reactive material scrambling.
How the 12-in-1 Calculator Syncs Your Project Data
The most powerful feature of this suite is its connected data architecture. When you calculate your lawn’s square footage in Card 1, that number automatically fills the soil volume, material cost, shipping weight, and watering schedule cards. Every single downstream calculation stays aligned with your real terrain, eliminating manual re-entry errors.
This automated synchronization means that changing one variable updates your entire project plan instantly. If you decide to expand a planting zone, your budget, topsoil order, and water bill estimate all update in real time. No more rebuilding your entire cost model from scratch every time you adjust your layout.
Measuring Your Yard: How to Calculate Sod for Irregularly Shaped Yards
Getting your square footage right is the single most important step in the entire process. Every downstream calculation — topsoil volume, pallet count, cost estimate, watering schedule — depends on this number being accurate. Taking the extra time to measure properly always pays off.
Dividing Complex Landscapes into Geometric Zones
The most reliable approach to measuring an irregular yard is to break it into simple shapes first. Walk your property and identify every distinct area: the front rectangle, the curved side strip, the circular feature bed around the fountain, and the triangular corner near the fence. Assign each space its own zone in Card 1 of the calculator.
This multi-zone approach lets you measure each section independently with the right formula. A perfectly rectangular front lawn needs just a length-times-width multiplication. A circular island bed requires a completely different calculation. By treating each space as its own geometry, you build a precise digital map of your entire property instead of one inaccurate rough estimate.
Key zones to identify and measure separately:
- Front yard rectangle or L-shape
- Backyard entertainment zone
- Side yard access strips
- Circular or curved feature beds
- Triangular corners near diagonal fences or driveways
The Geometry of Turf: Standard and Advanced Formulas
The calculator engine uses precise geometric formulas matched to each shape type. Understanding these equations helps you input your measurements correctly and catch any data entry errors before they ripple through your entire project budget.
Standard shape formulas:
- Rectangle/Square: Area = Length × Width
- Circle (e.g., a fountain ring): Area = π × r² (where r = radius)
- Triangle (diagonal fence corners): Area = 0.5 × base × height
- L-Shape: Split into two rectangles, calculate each, then add them together
Curved boundaries require a more advanced mathematical approach. The calculator uses Simpson’s Rule to estimate the area of irregular, wave-like borders. This method works by taking a series of parallel measurements across the curved zone and averaging them using a weighted formula:
Area ≈ (Δx / 3) × (y₀ + 4y₁ + 2y₂ + 4y₃ + … + 2y(n-2) + 4y(n-1) + yₙ)
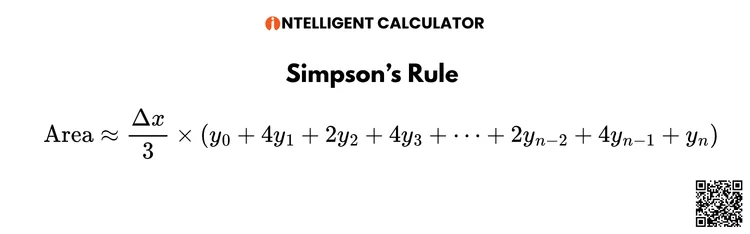
In practical terms, you measure the width of your curved garden bed at equal intervals along its length (every 2 feet, for example). The formula then weights these measurements alternately by 4 and 2, adds them up, and divides by 3 to estimate the total enclosed area. This approach is far more accurate than trying to eyeball a curved boundary as a rough rectangle.
Sod Pallet Coverage: How Many Square Feet in a Pallet of Sod?
This is one of the most commonly searched questions in landscaping, and the answer is not as simple as a single number. Regional differences, grass type, and farm harvesting practices all affect pallet sizing. Knowing the real numbers before you call your supplier prevents ordering confusion and delays.
Standard Pallet Sizes and Regional Differences
A standard sod pallet typically covers 450 square feet, but this number varies by region and grass variety. Warm-season grasses grown in Southern states (like Bermuda and St. Augustine) are often harvested on 400 to 500 square foot pallets. Cool-season sod rolls in Northern and Midwestern markets are frequently sold on 450 square foot pallets or as individual 10 square foot rolls measuring approximately 1.5 ft × 6.6 ft.
Common pallet sizes by grass type:
- Bermuda (South/Southwest): 400–500 sq ft per pallet
- St. Augustine (Southeast): 400–450 sq ft per pallet
- Kentucky Bluegrass (North/Midwest): 450 sq ft per pallet
- Zoysia (Transition Zone): 400–500 sq ft per pallet
- Tall Fescue (Mid-Atlantic/Pacific Northwest): 450 sq ft per pallet
Individual sod rolls typically measure 1 ft × 9 ft or 1.5 ft × 6.6 ft, covering 9 to 10 square feet each. Knowing this helps you plan the final few rows of a project where ordering a full pallet would result in massive waste.
Choosing Your Waste Factor: Simple vs. Complex Yards
No matter how carefully you measure, cutting sod to fit borders and curves always creates scrap. The waste factor setting in Card 2 adds a calculated safety margin to your net area before the calculator determines your total order quantity. Choosing the right margin prevents you from running short during installation.
Waste factor guide by yard complexity:
- 5% margin — Best for simple, square or rectangular lawns with straight borders and no obstacles
- 10% margin — Recommended for standard suburban yards with occasional curved beds or a few trees
- 15% margin — Use for yards with multiple curved borders, irregular walkways, or flower beds
- 20% margin — Required for highly complex sites with retaining walls, tight corners, and extreme contour changes
Card 2 applies your chosen margin to the gross square footage, then converts the total into full pallets and individual rolls. This breakdown helps you order exactly what you need without paying for a full pallet when you only need 30 extra square feet.
Preparing the Sub-Base: Soil Excavation and Topsoil Compaction Formulas
Proper sub-base preparation is what separates a lawn that thrives for decades from one that dies within its first season. Most installation failures trace directly back to poor soil preparation rather than weak grass genetics or watering mistakes. Getting this step right is non-negotiable.
The Soil Interface Rule: Preventing Layer Stratification and Root Shear
One of the most critical — and most overlooked — concepts in sod installation is the soil interface barrier. When you place fresh, high-quality topsoil directly on top of hard, compacted clay without properly tilling first, you create a boundary layer between the two soil types. This boundary blocks water movement, traps roots at the surface, and causes catastrophic root shear during dry periods.
To prevent this, till the top 4 to 6 inches of your existing subsoil before adding any new topsoil. This mechanical disruption breaks up the compaction layer, mixes the two soil types at the boundary zone, and creates a continuous porous medium that allows roots to grow deeply and water to drain freely.
Steps for proper sub-base preparation:
- Use a rototiller to break up the existing top 4 to 6 inches of subsoil
- Remove any large rocks, debris, buried wood, or root masses
- Add your new topsoil layer and till the interface zone lightly
- Grade the surface level, maintaining a slight slope away from structures
- Ensure the finished grade sits 0.5 inches below the top of hardscape borders (patios, sidewalks, driveways) to allow for the sod root-board thickness
That last point is critical. If you grade flush with your walkway, the sod root-board — which is typically 0.75 to 1 inch thick — will sit above the hardscape, creating an awkward mound that gets torn up by mowers every single time.
Calculating Excavation Depth and Soil Volume
Card 3 calculates how much soil you need to excavate and how much topsoil to bring in, based on your total area and desired soil depth. Setting an excavation depth of 1 inch removes existing weed networks and old thatch while creating a clean, level base for your new sod.
Adding a 2-inch layer of clean, organic loam topsoil introduces essential macro-nutrients and creates the porous growing medium that encourages rapid root penetration. The calculator converts these depth parameters into cubic yards for bulk delivery orders or individual retail bags if you’re working on a smaller installation.
The Compaction Factor: Why Soil Settles After Watering
Here is something most homeowners do not know: loose topsoil shrinks when it gets wet. When irrigation water hits freshly placed soil, the particles rearrange, air pockets collapse, and the total volume decreases by 15 to 20%. If you order only the exact raw volume you measured, your finished lawn will sink noticeably below your planned grade after the first watering cycle.
To prevent this settling problem, always apply a compaction factor when ordering bulk topsoil. Card 3 automatically adds this buffer to your raw volume calculation, giving you an adjusted order quantity that accounts for post-irrigation settlement. For standard sandy loam soils, plan for approximately 15% extra volume. For heavier clay-based topsoil blends, plan for closer to 20% additional material.
Soil bulk density reference guide:
- Dry sand/loam: approximately 2,000 lbs per cubic yard
- Standard moist loam: approximately 2,200 lbs per cubic yard
- Wet clay soil: up to 2,700 lbs per cubic yard
Knowing these density values helps you estimate not just volume but also the delivery weight, which becomes important when coordinating heavy dump truck access to your site.
Use the bulk cubic yard calculator to convert your topsoil measurements into precise bulk delivery quantities.
Estimating Sod Installation Costs: DIY vs. Professional Contractor
Understanding the true total cost of a sod installation requires looking beyond just the price per square foot of grass. Delivery fees, topsoil, tools, labor, and taxes all contribute to the real budget number. Card 4 and Card 5 work together to give you a complete, honest financial picture before you commit to a purchase.
Material Costs: Itemizing Sod, Topsoil, and Taxes
Grass type is the biggest variable in your material budget. Warm-season varieties like Bermuda are typically the most affordable option, while premium slow-growing types like Zoysia carry a significantly higher price tag. Card 4 lets you select from common varieties or enter a custom price per square foot to match your local supplier quotes.
Average sod pricing by grass type:
- Bermuda: $0.35–$0.55 per sq ft — resilient, heat-loving, fast-growing
- Kentucky Bluegrass: $0.55–$0.75 per sq ft — classic deep-green color, cool-season
- St. Augustine: $0.70–$0.90 per sq ft — excellent shade tolerance, stoloniferous
- Zoysia: $0.80–$1.00+ per sq ft — premium, drought-tolerant, slow-growing, very dense
The estimator also applies your local sales tax rate and adds freight charges based on your total pallet count and delivery distance. Having this full itemized breakdown prevents unexpected budget overruns when the invoice arrives.
DIY vs. Professional Installation: A True Cost Comparison
The choice between doing it yourself and hiring a professional crew is not just about saving money — it is about honestly valuing your own time and physical capacity. Card 5 builds a side-by-side comparison that makes this decision much easier.
DIY installation true costs include:
- Sod purchase price
- Bulk topsoil delivery fee
- Rototiller rental ($80–$150 per day)
- Sod roller rental ($40–$80 per day)
- Wheelbarrow and edging tool rental
- Your personal labor time (typically 8–16 hours for 1,500 sq ft)
Professional installation costs include:
- Labor rate of $1.00–$3.00 per square foot (varies by region and site complexity)
- Site preparation and grading fee (flat fee or hourly)
- Debris removal and hauling charges
Professional crews typically complete a full residential installation in a single day, which dramatically reduces the risk of turf dehydration between delivery and placement. DIY projects spread across multiple days require careful storage of pallets in shaded areas with regular misting to prevent the sod from dying before you get it in the ground.
Transport Logistics: Wet Sod Weight and Vehicle Safety
Fresh sod is far heavier than most people expect. This is not a topic that most calculator tools address seriously, but overloading a vehicle with wet sod creates genuine safety hazards on public roads. Understanding the weight math before your delivery day keeps both your vehicle and other drivers safe.
The Wet-Weight Trap: How Water Affects Sod Shipping
The weight of sod changes dramatically depending on its moisture content at the time of harvest and transport. A standard dry sod roll weighs approximately 30 lbs per square foot. Standard moist sod typically weighs around 40 lbs per square foot. Rain-saturated, freshly harvested rolls can reach 45 to 50 lbs per square foot under wet conditions.
Moisture-weight impact per standard 450 sq ft pallet:
- Bone-dry sod: approximately 1,350 lbs
- Standard moist sod: approximately 1,800 lbs
- Water-saturated fresh sod: 2,025–2,250 lbs
A single moist pallet at 1,800 lbs can already exceed the payload limit of many common passenger vehicles. Two pallets in a standard trailer can push total cargo weight past 3,600 lbs, which creates serious structural and braking stress on most consumer-grade trucks and SUVs.
Vehicle Payload Limits and GVWR Compliance
Gross Vehicle Weight Rating (GVWR) is the maximum total weight your vehicle and its cargo can safely reach, as certified by the manufacturer. Exceeding your GVWR rating does not just damage your vehicle — it reduces your braking effectiveness and can result in traffic violations or liability in an accident.
Common vehicle payload limits for reference:
- Mid-size SUV with trailer: approximately 1,000 lbs payload
- Half-ton pickup (e.g., Ford F-150): approximately 1,800 lbs payload
- Three-quarter-ton pickup (e.g., Ford F-250): approximately 3,000 lbs payload
- Heavy-duty dual-rear-wheel truck: 4,000+ lbs payload
Safety rules for sod transport:
- Never exceed your vehicle’s rated payload capacity
- Always account for water-saturated sod weight, not dry estimates
- Order professional flatbed delivery for any order exceeding 1,500 lbs
- Distribute pallet weight evenly across your truck bed or trailer floor
- Check tire pressure before loading — heavy cargo requires maximum rated inflation
Card 6 automatically checks your total calculated order weight against the payload limits of common vehicle types and displays a warning if your load exceeds safe operating parameters. When the warning appears, professional delivery is not optional — it is required.
Master Budgeting: Planning for Unexpected Costs
Even the most carefully planned landscaping projects hit surprise expenses. A buried irrigation line, unexpected rock layer, or sudden material price spike can derail a tight budget quickly. Card 7 gives you the financial control system to absorb these shocks without stopping your project.
Bringing All Costs into One Ledger
The master budget module pulls together every cost element you have entered across all the previous cards. Sod material, topsoil delivery, equipment rentals, labor fees, freight surcharges, and applicable sales taxes all appear together in one clean financial summary. Having this complete picture before you sign any supplier agreements gives you real negotiating leverage.
Why You Need a Contingency Buffer
Professional contractors build contingency buffers into every single project estimate because experience has taught them that unexpected costs are not a rare exception — they are a routine reality. Hidden drainage problems, soil quality issues, and material price changes all happen regularly on real job sites.
Contingency buffer recommendations by project type:
- 5% buffer — Small, simple, flat yards with no known complications
- 10% buffer — Standard residential lots (strongly recommended as a minimum)
- 15% buffer — Yards with known drainage issues or partial grading requirements
- 20% buffer — Complex sloped sites, properties with buried infrastructure, or sites requiring extensive excavation
A 10% contingency on a $3,000 project sets aside just $300 as insurance. That small reserve can absorb an emergency bag of topsoil, an unexpected tool repair, or a delivery trip charge without blowing your entire financial plan.
Root Health: Starter Fertilizer and Spreader Calibration
Fresh sod experiences significant biological stress during installation. The harvesting process cuts the root system, and the transplanting process exposes those cut roots to drying air and temperature changes. Providing the right nutrients immediately after installation is critical to preventing transplant shock and driving rapid root establishment.
Preventing Transplant Shock with the Right Nutrients
High-phosphorus starter fertilizers are specifically formulated to support newly installed sod. A 10-20-10 N-P-K formula (10% nitrogen, 20% phosphorus, 10% potassium) provides the elevated phosphorus that drives cell division and root tissue development during the first critical weeks.
Card 8 uses your total square footage and your chosen product’s nitrogen percentage to calculate the exact weight of fertilizer needed for your yard. This removes the guesswork and ensures you purchase the right amount without running out halfway through the application.
Common starter fertilizer options:
- 10-20-10 formula — Classic high-phosphorus starter for new sod and seed
- 18-24-12 formula — Premium starter blend for high-quality installations
- Slow-release organic blends — Lower burn risk, longer-lasting nutrition, better for sensitive soils
Calibrating Your Spreader to Avoid Fertilizer Burn
Applying fertilizer unevenly creates a patchy lawn. Too little in some areas leaves the grass nutrient-starved and pale. Too much in other areas burns the tender young roots, leaving dead brown streaks that take weeks to recover. Proper spreader calibration is the only way to ensure even, safe coverage.
General spreader calibration reference:
- Scotts EdgeGuard: Setting 3–4 for most starter fertilizers at standard 1,000 sq ft rates
- EarthWay Ev-N-Spred: Setting 12–15 for fine granular products
- Chapin model spreaders: Setting 4–5 for medium granular starter formulas
Always test your spreader calibration on a hard surface before applying to your lawn. Walk at a normal pace, maintain consistent speed, and overlap your passes by approximately 3 inches to eliminate striping.
Water Management: The 30-Day Establishment Schedule
Water management is the single highest-impact variable in sod survival. New sod can dry out and die within hours on a hot day if irrigation is insufficient. At the same time, over-watering saturates the soil, promotes fungal disease, and drowns shallow roots. Card 9 builds a phase-by-phase irrigation schedule precisely calibrated to your grass type and local climate conditions.
The Three Phases of Early-Stage Watering
Phase 1 — Days 1 to 10: Critical Hydration Water three times daily during the first ten days after installation. Keep the sod root-board consistently moist but not puddled. The goal is to prevent any drying of the exposed root mat while the new roots begin to extend downward into the prepared topsoil.
Phase 2 — Days 11 to 21: Transition Establishment Reduce to twice-daily watering during the second phase. The reduced frequency encourages roots to grow deeper in search of moisture, building the deep root architecture that makes the lawn drought-resistant. The soil surface can dry slightly between morning and evening cycles — this is intentional.
Phase 3 — Days 22 to 30: Deep Watering Transition Shift to once-daily deep watering in the final establishment phase. Longer, slower cycles push moisture deeper into the soil profile, fully transitioning your lawn to a standard adult irrigation routine. By Day 30, a healthy lawn should be ready for normal maintenance watering.
Grass type watering adjustments:
- Cool-season grasses (Kentucky Bluegrass, Tall Fescue): Higher moisture requirements, especially during warm weather. These C3 grasses use the Calvin Cycle and struggle more during heat stress than warm-season varieties.
- Warm-season grasses (Bermuda, St. Augustine, Zoysia): These C4 grasses are more efficient at water use under heat. Stoloniferous varieties like St. Augustine and Bermuda spread laterally via surface runners and establish root contact quickly. Rhizomatous grasses like Kentucky Bluegrass spread through underground stems and may take slightly longer to show full establishment.
Estimating the Impact on Your Water Bill
Card 9 connects your daily gallon requirements to your local municipal utility rate. This produces a real dollar estimate of what your 30-day establishment watering schedule will add to your monthly water bill. Most homeowners are surprised how much new sod requires — this estimate prevents sticker shock when the bill arrives and allows you to budget accordingly.
The Care Calendar: Key Milestones for Your New Lawn
Even after the first 30 days, your new lawn still needs careful management to develop into a dense, resilient turf that blocks weeds and handles seasonal stress. Card 10 creates a personalized maintenance calendar using your actual installation date as the starting point for all milestone calculations.
Setting Your Timeline from Day One
The calendar maps out every key event in your lawn’s early life: when to stop Phase 1 watering, when to apply your first post-establishment fertilizer, when weed control applications are safe, and when to schedule your first core aeration cycle. Having specific dated reminders removes the guesswork and prevents the most common early maintenance mistakes.
The “Tug Test” and Your First Safe Mow
Before you mow for the first time, you must confirm that the roots have actually anchored into the soil. Mowing before root establishment tears the sod loose, sets the lawn back by weeks, and can kill entire sections. The Tug Test is the only reliable way to check.
How to perform the Tug Test:
- Grab a corner of the sod firmly with both hands
- Pull upward with moderate force
- If the sod lifts easily without resistance, roots have not established yet — wait 3 more days and test again
- If you feel clear resistance and the sod stays in place, your roots have knitted and you are ready to mow
First mow guidelines:
- Wait a minimum of 10 to 14 days after installation before mowing
- Set mower height to 2.5 inches for warm-season grasses (Bermuda, Zoysia, St. Augustine)
- Set mower height to 3.5 inches for cool-season grasses (Kentucky Bluegrass, Tall Fescue)
- Use only sharp mower blades — dull blades tear and shred young grass rather than cutting cleanly
- Follow the 1/3 Rule — never remove more than one-third of the total blade height in a single mowing session. Removing too much blade at once stresses the young root system severely
Mower type comparison for new lawns:
- Rotary mower — Most common, works well for all lawn types at standard heights
- Reel mower — Best for low-cut warm-season grasses like Bermuda, very clean cut
- Robotic mower — Excellent for ongoing maintenance but should not be used until roots are fully established
Track your long-term mowing time and cost projections with the acres per hour mowing calculator.
Long-Term Costs: 5-Year Maintenance Projections
A beautiful lawn is not a one-time expense. Understanding the ongoing annual costs of keeping your sod healthy helps you build a realistic long-term property care budget and make smarter decisions about grass variety selection from the start. Card 11 projects your maintenance costs across a full 5-year horizon.
Estimating Yearly Maintenance Expenses
Key annual maintenance cost categories:
- Irrigation: Standard lawn maintenance requires approximately 1 inch of water per week during the active growing season. Warm-season grasses have lower overall water requirements than cool-season types, which need consistent moisture even during milder temperatures.
- Fertilization: A complete fertilization program typically involves 4 applications per year — early spring, late spring, mid-summer, and fall. Skipping applications gradually depletes the soil nutrient profile and allows weed species to invade thin turf.
- Mowing: DIY mowing costs include fuel, blade sharpening, and equipment maintenance. Professional mowing services in most markets range from $40 to $100 per visit depending on yard size and region.
- Core Aeration: Annual core aeration is strongly recommended for all established lawns to relieve soil compaction, improve water infiltration, and encourage deeper root growth. This service typically costs $75 to $150 for a standard residential property.
- Weed Control: Pre-emergent herbicide applications in early spring are the most cost-effective defense against common lawn weeds. Post-emergent spot treatments throughout the growing season handle any breakthrough weeds.
Calculate your mowing expenses with the mowing cost estimator.
Financial Return: Real Estate Value and Curb Appeal ROI
A premium sod installation is not just a cosmetic improvement — it is a measurable financial investment in your property asset. Card 12 turns your total project cost into an ROI calculation by comparing your upfront investment against your projected increase in home market value.
How Quality Landscaping Boosts Home Value
Research from the National Association of Home Builders (NAHB) and multiple real estate valuation studies consistently shows that high-quality landscaping increases a home’s market value by 1% to 5% depending on regional market conditions and the overall quality of the installation. On a $400,000 home, a 3% increase represents $12,000 in added market value from a project that may have cost only $3,000 to $5,000.
Card 12 uses your reported home value and your chosen appreciation percentage to calculate the projected dollar increase in property value. It then subtracts your full 5-year maintenance cost from that projected gain to display your true net financial return and ROI percentage.
Sod vs. Seed: A 5-Year Financial Comparison
Many homeowners choose seeding over sodding because the upfront material cost is dramatically lower — grass seed typically costs $0.05 to $0.15 per square foot versus $0.35 to $1.00 per square foot for sod. However, this upfront savings often disappears when you account for the full 5-year cost picture.
Why seeding often costs more over time:
- Erosion risk — Bare seed areas on sloped lawns require straw blanketing, erosion netting, or repeated reseeding after heavy rain events
- Longer establishment — Seeded lawns typically take 8 to 16 weeks to achieve comparable density to freshly installed sod
- Weed invasion — Slow-establishing seeded areas are highly vulnerable to weed colonization, requiring multiple herbicide applications in the first year
- Intensive early watering — Seed requires 3 to 4 daily light watering cycles during germination, consuming comparable water volume to new sod
- Overseeding gaps — Thin or bare patches require overseeding in Year 1 and Year 2, adding material and labor cost
By Year 3, the cumulative weed control, water, and reseeding costs associated with a low-quality seed establishment often equal or exceed the initial premium paid for professional sod installation. Card 12 provides a structured table to help you make this comparison for your specific property and climate.
Troubleshooting: Diagnosing Common Lawn Problems
Even a professionally installed lawn can develop problems in the first 30 days if conditions change unexpectedly. Recognizing the early warning signs and responding quickly prevents minor stress from turning into permanent damage. The built-in interactive troubleshooting matrix in the calculator guides you through a symptom-by-symptom diagnostic process.
How to Fix Yellowing, Thinning, or Loose Sod
Common problems and their solutions:
- Sod is yellowing, dry, or brittle despite regular watering — Check your irrigation coverage pattern for dry spots. Irregular sprinkler coverage creates zones of under-watering even when adjacent areas are sufficiently wet. Also check for soil compaction directly beneath the yellowing area, which can block root penetration regardless of water availability.
- Sod feels spongy, dark, or musty-smelling — Over-watering is causing root saturation and early fungal development. Reduce watering frequency immediately and allow the soil to dry slightly between cycles. Improve drainage in persistent wet areas by core aerating or topdressing with coarse sand.
- Sod remains loose after 21 days — This almost always indicates a soil compaction problem directly beneath the sod root-board. Remove a small test section and inspect the soil interface. If you find a hard clay barrier below your topsoil layer, the two soil types were not properly tilled together before installation. Gently lift the sod, till the interface zone, and re-lay the section.
- Brown patches forming rectangular or seam-shaped patterns — Dry seams between sod pieces indicate gaps in soil contact. Press the seams firmly with a sod roller immediately and increase watering frequency until the gaps close and root establishment seals the boundary.
- Lawn remains thin or patchy after 45 days — Consider light topdressing with a thin layer of quality topsoil followed by gentle raking to fill depressions and encourage additional root contact. Topdressing is also an excellent recovery strategy after any frost damage or drought stress during the establishment period.
Localized Turfgrass Presets
The tool would benefit significantly from regional grass type presets that automatically adjust default settings based on the user’s location. A Southern Warm-Season preset would default to Bermuda or St. Augustine pricing, 400–450 sq ft pallet sizing, and heat-adjusted watering multipliers. A Northern Cool-Season preset would default to Kentucky Bluegrass or Tall Fescue pricing, standard 450 sq ft pallets, and spring-focused maintenance timeline settings.
Frequently Asked Questions (FAQs)
How many square feet does a pallet of sod cover?
A standard pallet of sod typically covers 450 square feet, but this varies by region and grass type. Warm-season varieties like Bermuda and St. Augustine are often sold on 400 to 500 square foot pallets. Cool-season types like Kentucky Bluegrass are usually sold on 450 square foot pallets or as individual 10 square foot rolls.
How do I calculate sod for an irregularly shaped yard?
Break your yard into simple shapes first — rectangles, triangles, and circles. Calculate each zone separately using its matching formula, then add all the areas together. For curved borders like garden beds or winding pathways, the calculator uses Simpson’s Rule to estimate the area accurately by taking a series of parallel measurements across the curved boundary.
What waste factor should I add when ordering sod?
For simple, rectangular lawns use a 5% waste margin. Standard yards with a few curves or trees need a 10% margin. Yards with multiple flower beds, curved walkways, or retaining walls need 15 to 20%. Always add a waste factor because cutting sod to fit edges and borders creates unavoidable scrap material.
How much does sod installation cost per square foot?
Material costs range from $0.35 to $1.00+ per square foot depending on grass type. Bermuda is the most affordable at $0.35–$0.55, while Zoysia runs $0.80–$1.00 or more. Professional labor adds another $1.00 to $3.00 per square foot on top of materials. DIY installation saves on labor but requires tool rentals and significant physical effort.
How heavy is a pallet of sod, and can I transport it myself?
A standard moist sod pallet weighs approximately 1,800 lbs. Wet, rain-saturated sod can push that number to 2,250 lbs. Most half-ton pickup trucks have a payload limit of around 1,800 lbs, meaning even one wet pallet can max out your vehicle. For any order exceeding 1,500 lbs, professional flatbed delivery is strongly recommended to avoid vehicle damage and road safety hazards.
When is it safe to mow new sod for the first time?
Wait a minimum of 10 to 14 days after installation before mowing. Always perform the Tug Test first — grab a corner of the sod and pull upward. If you feel firm resistance, the roots have anchored and mowing is safe. Set your mower to 2.5 inches for warm-season grasses and 3.5 inches for cool-season types. Never remove more than one-third of the blade height in a single mowing session.
How often should I water new sod during the first 30 days?
Follow a three-phase watering schedule. During Days 1 to 10, water three times daily to keep the root board consistently moist. During Days 11 to 21, reduce to twice daily to encourage deeper root growth. During Days 22 to 30, shift to once-daily deep watering to transition your lawn to a normal irrigation routine. Warm-season grasses need slightly less water than cool-season varieties during this period.
Is sodding worth it financially compared to seeding?
Sod costs significantly more upfront, but it often delivers better long-term value. Seeded lawns take 8 to 16 weeks to reach comparable density, carry high erosion risk on slopes, and require intensive weed control in the first two years. Research shows quality landscaping can increase home market value by 1% to 5%. On a $400,000 home, that equals up to $20,000 in added value — making a professional sod installation a strong long-term financial investment.